Thursday, September 27, 2012

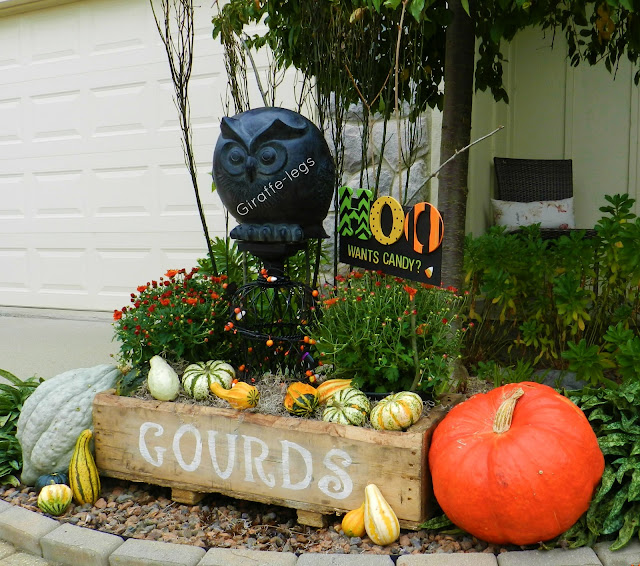
Fall owl display


 Hoo wants candy?


 It started with this cute chubby owl at Homegoods on Clearance for $18.


Which lead to this sign . . . 


Which sparked an idea for a pallet planter, but before the hubby could build me one, I found this freebie!


Which lead to this. . . 


So I took an old wire vase and painted it black.


Added some gourds and mums and came up with this.


 Which made me feel. . . .


so, whoo thinks this is cute????


I'd like to welcome all of my new followers! Thanks for being here and following along!!   I also added a FACEBOOK page.  Hop on over and "like" me.  

Diane


Partying at:


   The 36th AVENUE      
Debbiedoo's

Tuesday, September 25, 2012

Homemade Laundry Soap with a surprising bonus


I've seen so many bloggers posting about making their own laundry soap, that I had to give it a try.  About 6 weeks ago I made my first batch.  I followed this recipe from Stonegable blog recipe for laundry detergent, but instead of using 2 of the Downy Unstoppables, I used 1 container of Purex fabric softener crystals.  Two reasons for this: 1) they are cheaper and 2) I usually use unscented detergent due to sensitive skin issues.  I was afraid to add too much scent.  I have had no reaction at all to this new formula of detergent and it had been well over a month.  I was so skeptical of doing this that I made 1/4 of the batch the first time.  I've have since remade a larger batch.  


One of the first things I loved about this detergent was the smell.  Fels Naptha Soap and the Purex crystals smell so good, while making it and while doing the laundry.  I grate the soap bar with a grater first and then put it in my food processor with some baking soda to break it down into smaller pieces.  I really do have to admit that my clothes look brighter and are softer.  My whites are the most noticeable.  I do all of my wash in cold water, except the whites, I use warm or hot because that's what activates the Oxyclean the best.  

So are you wondering what the bonus is?  I have a front loader washing machine.  It is a Whirlpool that I've had for at least 10 years.  While I love my washer very much, it had a bad odor. All of you out there with a front loader are shaking your heads yes right now.  They get that build up inside the drum and they smell, really, really bad.  Shut the door to the laundry room and hold your breath bad.  Especially when you haven't used your washer in a few days.  Am I right or what?  But since I started using this new detergent the odor is GONE!!  Completely!!  I have tried all of the washer cleaners, and the Smell Begone brand, and vinegar and leaving the door open.  Nothing has ever really worked, until now!!  I wasn't even going to blog about making the detergent, but as the odor disappeared (  it will take several washes) I was so happy I had to share!  It's a miracle!!

So hop on over and see the recipe at StoneGable, then make some.  It's not really that hard and it's so much cheaper than buying the pre-made stuff.  I use about a 1/4 cup per load.


Take Care now!

Di
Home Stories A2Z

Monday, September 24, 2012

A Facebook Fan page

First of all, I want to say welcome to all of my new followers.  I've gotten quite a few more people following me lately, which is so exciting!  I can't thank you all enough - really!  I have been thinking about a Facebook page for a while now, but just hadn't taken that plunge.  It's a little scary and I don't really feel like I know too much.  Then the sweet and kind Debbie from http://debbie-debbiedoos.com/ suggested I do it.  I'm sure you all know Debbie, the newbie pied piper of blogland.  Leading all of us newbies along the blogging path, so kindly and gently as we splash into the blog world and try to swim our way along with the sharks, even though I feel like such a little fish!

And so without further ado I ask you to please LIKE ME on my new FB page.


Right now it's completely infantile.  I have to make a cover and then figure out how to get a button on this blog too, and I'm sure fifty million other things, but I'm there, and I am happy and excited, and nervous too!

Thanks to all of you who follow along!  

Tuesday, September 18, 2012

Fall Mantel 2012

 Welcome Fall!  Nothing says Fall like the kids being back in school all day and me having time to create.  Cooler air, crisp nights, sleeping with blankets, and all the beautiful colors that come to Michigan.  Yes, soon enough we will be freezing and grey skied for months on end, but God tries to make up for that misery by giving us great beauty in the Fall.  This is actually the first year that I have decided to do a Fall Mantel before I decorate for Halloween.  Usually I just go straight to Halloween decor.


I started by making the Fall Bunting by using only items I had in the house already.  Old scraps of fabric, paint, twine, ribbons and yarn.


I dragged up a piece of old barn wood left-over from the basement renovation to help add a more rustic look to the mantel.  Not much is more rustic than 120 year old barn wood.


I then pulled together some Fall accents I had in the house and there it was!  I like to work with 3 principles when decorating my mantel.  They are balance, color, and symmetry.  I find it most pleasing to the eye.


 Thanks for stopping by and checking out my mantel.  Hope you liked it.  Don't forget to follow me!

Di
Parties I've joined:

The 36th AVENUE
shabby creek cottage

Photobucket

Sunday, September 16, 2012

Jewelry Armoire Make-over

 This is a story about an armoire. . . . 


 Once upon a time there was a jewelry armoire that wished she were prettier.  Sure she had good bones, but she was stuck in the 90's golden oak ages.  She longed to be more hip, but how with this ugly finish?  
Then one day a lady named Annie Sloan came along with some lovely and softer colors. Her paints seemed to beg to help her.  The armoire got happy thinking about what she could be .  . . . .  She wanted to be more fashionable, but yet, she longed to be a classic beauty as well.  And so the day finally came when armoire got a make-over.  No, she didn't get to go to New York and she did not get $5,000 to buy all new clothes, but she did get a face-lift that made her smile at her new found beauty.
A coat of Paris Grey,


Followed by a mixture of old white paint mixed with clear wax, and applied with a wet cloth.


Then another coat of clear wax to make her shimmer, oh so lovely in the light.

And her pulls got a lift too.  A little nip and tuck, followed by a touch of patina to give her just a slight bit of color.  She decided to let just a peek of her old self show though, because after all, she did have good bones!


And now she felt special.  New but at the same time old.  She knew she would be loved.
And she was IS!


   Today's Creative Blog

Home Stories A2Z     Life on Lakeshore Drive

Friday, September 14, 2012

Pumpkin Sopaipilla Cheesecake

First off you may be asking what in the world is a Sopaililla?  

To this I answer:

sopaipillasopapillasopaipa, or cachanga 
is a kind of fried pastry and a type of quick bread 
served in Argentina, Bolivia, Chile, New Mexico, 
Peru, Texas, and Uruguay.

No, I am not really that smart, I just cut and paste the answer from Wikipedia!  What I call it is yummy deliciousness. I found this recipe on the Pillsbury site here when I was looking for a quick and tasty dish to serve at our ice breaker meeting at my MoMs group.  The recipe looked good, but I wanted something with a little more fall flavor, so I decided to kick it up and add some pumpkin.  Now, if you are my husband, you are saying things like, "why do you make something new every time we have to bring something some where?  What if it tastes bad?  What if everyone hates it?  Why can't you ever make the same thing twice.  Stay with the tried and true."  I say, "What's the fun in that?"  I like to change recipes and create.  And so I take that chance and I have never had a total flop - yet!  

So, here is MY recipe for a Pumpkin Sopaililla Cheesecake.

2 cans of butter flavored crescent rolls
2 8oz. reduced fat cream cheese - room temp.
8 oz. of canned pumpkin (yes the can is 16oz. use half and save the rest for something else)
1 tsp. of pumpkin pie spice
3/4 cup of sugar
1 tsp. of vanilla
1/4 cup of melted butter
plus another 1/4 cup of sugar and 1 tsp. of cinnamon mixed together for topping

Preheat oven to 350.


Begin by pressed one can of crescent rolls into the bottom of an ungreased 9x13 glass dish.


Mix together cream cheese, sugar, vanilla, pumpkin and spice.  I used a mixer to get it nice and smooth.


Spread mixture over the crescent rolls.


I used waxed paper to place the second rolls of crescents on and roll it out a little to fit the pan, as the rolls are slightly smaller than the pan.  I then transferred the rolls onto the mixture by flipping over the wax paper on top of the pan.


Next you pour on the melted butter and sprinkler the cinnamon sugar mixture over the top.


Looks good already- right?

Bake at 350 degrees for 40-45 minutes or until it is browned and bubbly.  The pumpkin increases the cooking time from the original recipe.  Too bad I learned this as I waited for it to finish baking, then I threw it in a carrier and rushed off to the meeting.  I served it warm (almost hot) due to my increased baking time.  When it cooled down the pumkin and cheese mixture firmed up and was almost like pudding.  I would recommend letting it cool for at least 1/2 hour before serving.  It can also be refrigerated and served cold, but I like my pumpkin a little warm.


Literally out of the oven and out the door!

I was very delicious and I would totally make this again.  I got lots of compliments of it.  

It's been a cool and rainy morning here in Michigan, but the sun is finally coming out, so I think I will venture out too.

Hope your day is happy.

Di